Introduction
iFixit’s SSD enclosure allows you to repurpose a factory-installed Mac SSD as a portable external drive. Follow this guide to learn how to install your SSD into the enclosure.
If you still need to complete your SSD upgrade, find your Mac and look for the SSD Replacement guide.
Note: These enclosures are designed to be used with factory-installed Mac Solid State Drives, and will not work with other PCIe replacement drives and adapters, including OWC Aura Pro drives.
What you need
-
-
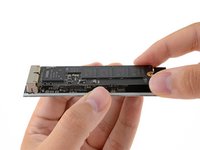
Carefully insert your Mac OEM SSD as shown, with the golden contact pads below the connector pins facing upward.
-
-
-
-
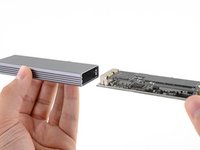
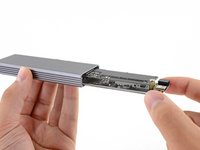
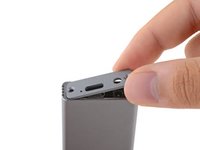
Slide the SSD sled into the metal enclosure, SSD connector end first.
-
-
-
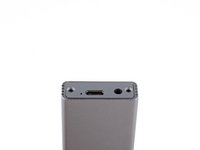
The drive is now ready to be connected to your computer with either of the included USB cables.
-


Once your drive is installed, you can transfer data from it, or use Disk Utility to format it and use it as a Time Machine backup.
Once your drive is installed, you can transfer data from it, or use Disk Utility to format it and use it as a Time Machine backup.
Cancel: I did not complete this guide.
10 other people completed this guide.


6 Comments
Danke für das Teilen. Es wäre besser, wenn Sie ein zusätzliches Video-Tutorial haben. bloxorz
Is there any driver that needs installed for this? My MacBook Pro, a MacBook Air, and a Windows machine do not recognize any USB storage device is being connected at all. Nothing shows up with Disk Utility.
Installed an original MacBook Air 11" Early 2014 SSD drive - doesn't work at all! Waisted €119,95
The install was successful and the drive reads just fine. However, the drive will disconnect itself after a couple minutes. Usually while I'm transferring or browsing files to see which one to transfer next. So basically about the same as all the other generic enclosures I've bought. Is there a fix and or recourse? I don't like wasting over a c-note for something that does the same as the half-priced competitors.